How to make a shirt in Roblox without breaking the UV layout
A good classic shirt begins with the correct template and ends with a Studio test. The browser preview in between helps catch mapping mistakes before the paid upload.
585 × 559 PNG
Preview and align your shirt PNG
100% in-browser
What this template is for
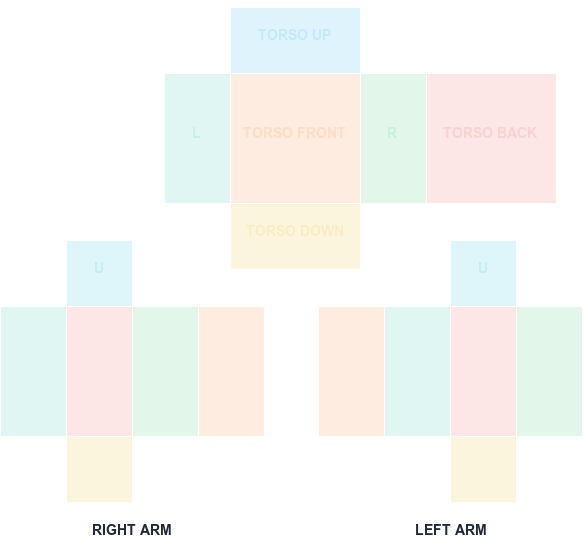
A Shirt object wraps one 585×559 PNG around the torso and arms of a supported block avatar. Each rectangle is a particular front, back, side, top, or bottom surface.
How to use it
Download the blank Shirt PNG. Paint under the guide on separate layers. Export a transparent 585×559 PNG, preview it here with guides off, test it on a block rig in Studio, then upload it as Shirt in Creator Dashboard.
Step by step
1
Download the blank shirt template
Start from a clean 585x559 sheet with the labeled guide. Everything downstream depends on beginning at the correct canvas size.
2
Paint on layers beneath the guide
Keep the guide pinned above your work at reduced opacity so panel boundaries stay visible. Paint on separate layers underneath so the guide never merges into the artwork.
3
Export a transparent 585x559 PNG
Hide the guide layer and export PNG with transparency intact. Confirm the exported file still reports the original dimensions.
4
Test on a block rig, then upload
Apply the texture to a block rig in Studio to see how it wraps in motion. Once it looks right, upload it as a Shirt asset in Creator Dashboard and pay the R$10 fee.
Sizes and upload facts
Key numbers for this template
Canvas size
585 × 559
The full classic Shirt sheet. Never resize it.
Torso front / back
128 × 128
The two widest panels — your main design area.
Sides, arm faces
64 × 128
Narrow panels that wrap the torso sides and limbs.
Upload fee
R$10
Charged per classic clothing asset at upload time.
Common mistakes
Uploading before testing in Studio
The fee is charged per upload attempt, not per successful design. A two-minute rig test is cheaper than a second upload.
Choosing the wrong asset type at upload
Shirt, Pants, and T-Shirt are distinct asset types. A correct file uploaded under the wrong type maps to the wrong body surfaces.
Painting over the guide instead of under it
If artwork sits above the guide layer, hiding the guide leaves gaps where you traced. Always paint beneath it.
FAQ
Questions before you upload
What program should I use to make a Roblox shirt?
Use any image editor with layers, exact pixel sizing, and PNG transparency. The specific editor matters less than preserving the template.
Can I test a shirt before paying the upload fee?
Yes. Import the image for testing in Studio and apply it to the ShirtTemplate property of a Shirt object on a block rig.
Why are parts of my shirt upside down?
Top, bottom, and side UV faces have different orientations. Use the labeled guide and inspect each cropped face before uploading.
How much does it cost to make a shirt in Roblox?
The template and preview steps are free. Roblox charges R$10 to upload each classic clothing asset, and that fee applies whether or not the design turns out correctly.
Do I need Roblox Studio to make a shirt?
Studio is not required to create the image, but it is the only reliable way to see how the texture wraps on an avatar before you pay to upload.
How long does shirt approval take?
Classic clothing goes through automated moderation, which is usually quick but can vary. Designs using recognizable third-party artwork are more likely to be rejected.
Blank canvas files
Download a template at the right size
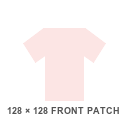
Start with a transparent, Roblox-compatible guide. Shirt and pants wrap around the avatar; the classic T-shirt is a 128×128 front patch.
585 × 559 PNG
Classic Shirt UV Template
585×559 torso and arm layout with color-coded faces.